


How to Measure Your Wall for a Custom Wall Mural or Wallpaper
Measuring your wall for a custom mural is simple—all you need is a tape measure and a few minutes. Follow the quick steps below, or scroll down to find the exact guide and diagram for your wall type.
Quick Summary: How to Measure Your Wall in 4 Steps
- Exclude trim & molding: Measure only the paintable wall surface you want to cover. Do not include baseboards, crown molding, or chair rails.
- Measure width in 3 places: Measure horizontally across the top, middle, and bottom of your wall. Write down the widest measurement.
- Measure height in 3 places: Measure vertically on the left, center, and right of your wall (from the top of the baseboard to the ceiling or crown molding). Write down the tallest measurement.
- Round up to the nearest inch: Always round your largest width and largest height up to the next full inch. (For murals over 52" wide or tall, we automatically add 1 inch of extra print bleed all around—on all four sides—for easy trimming during installation!)
Full vs. Partial Wall Murals
First, consider whether you are covering the entire wall or only a portion of the wall. A full wall mural creates an immersive experience, while a partial wall mural gives a similar decorative impact as hung art.
If you plan to install a partial wall mural, measure the width and height of the exact area you want the mural to cover.
If you plan to cover the entire wall with a mural, follow the specific guide below that matches your type of wall.
How to Measure by Wall Type
Standard Walls
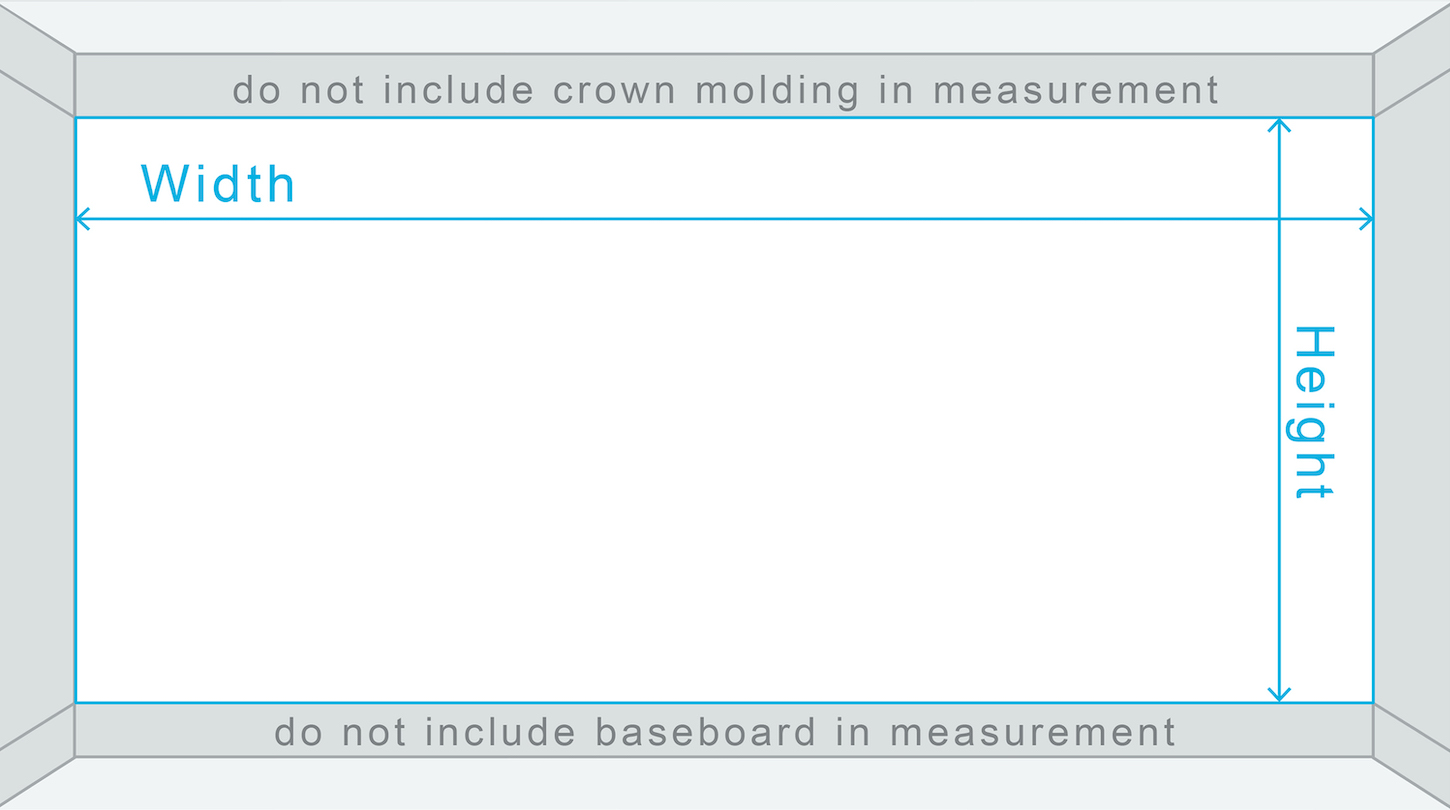
Because walls settle over time and are rarely 100% square, use the 3-point measurement rule:
- Width: Measure the width of the wall horizontally at the top, middle, and bottom. Take the greatest of those three measurements.
- Height: Measure the height of the wall vertically at the left corner, center, and right corner. Take the greatest of those three measurements.
- Exclude trim & round up: Do not include baseboards or crown molding in your measurements. Round both your largest width and largest height up to the nearest inch.
Note on Print Bleed: If either the width or height exceeds 52 inches, we automatically add 1 inch of "bleed area" all around (on every side of the full mural, adding 2 inches to total width and 2 inches to total height). This gives you leeway during the installation process, and any excess material will be trimmed away once the mural is hung.
Doors & Windows (and Other Obstacles)
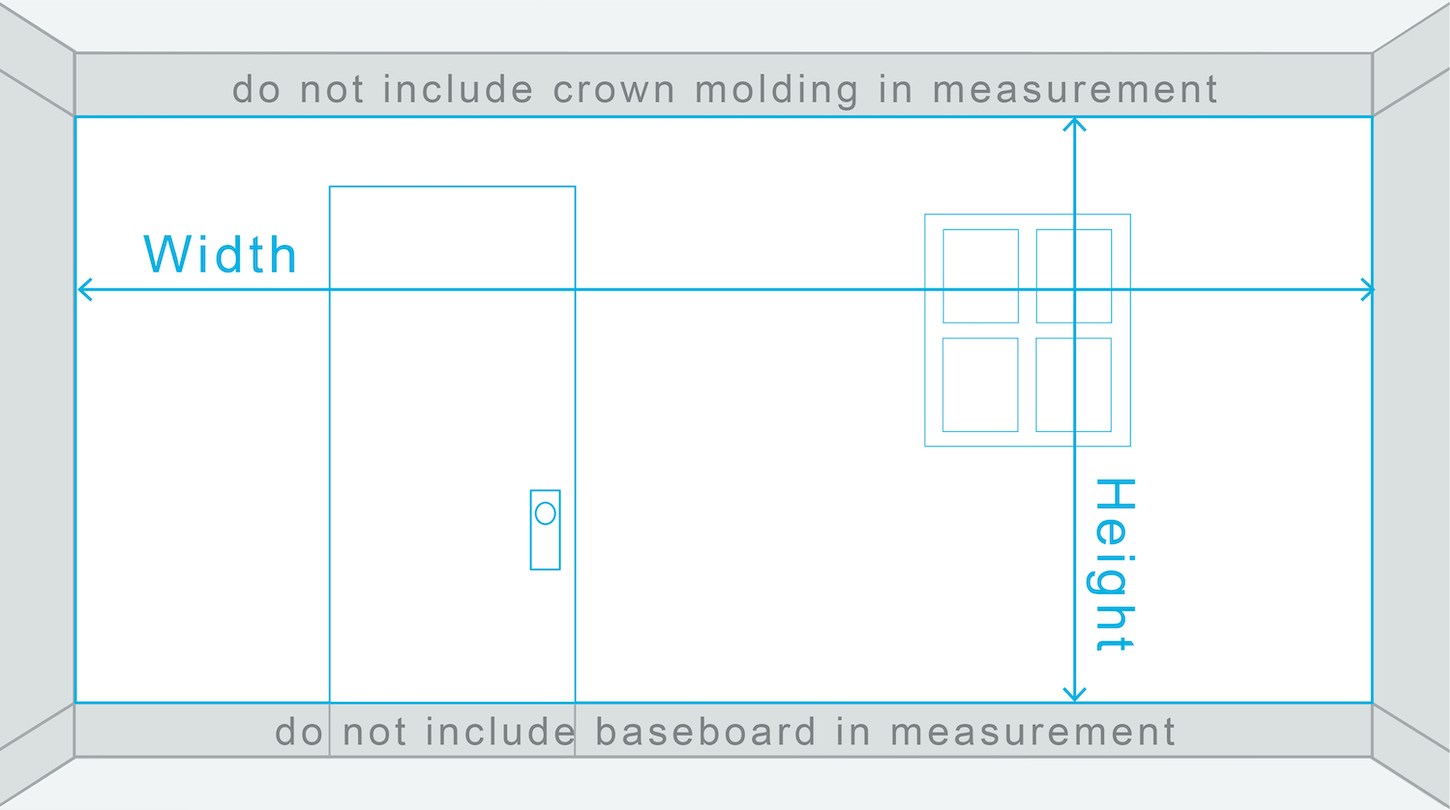
If your wall contains obstacles such as doors, windows, fireplaces, or built-in cabinets, simply measure the full width and height of the wall as if they are not there. The obstacles will be cut out during the installation process. You can measure right over small fixtures like electrical outlets, light switches, sconces, and vents.
Design Tip: If your wall has a large door, window, or bed headboard, jot down roughly where that obstacle sits on the wall. You can share those details (or a quick room photo) with our Account Managers to make sure important focal points of your mural artwork aren't cut away during installation!
Multiple Walls
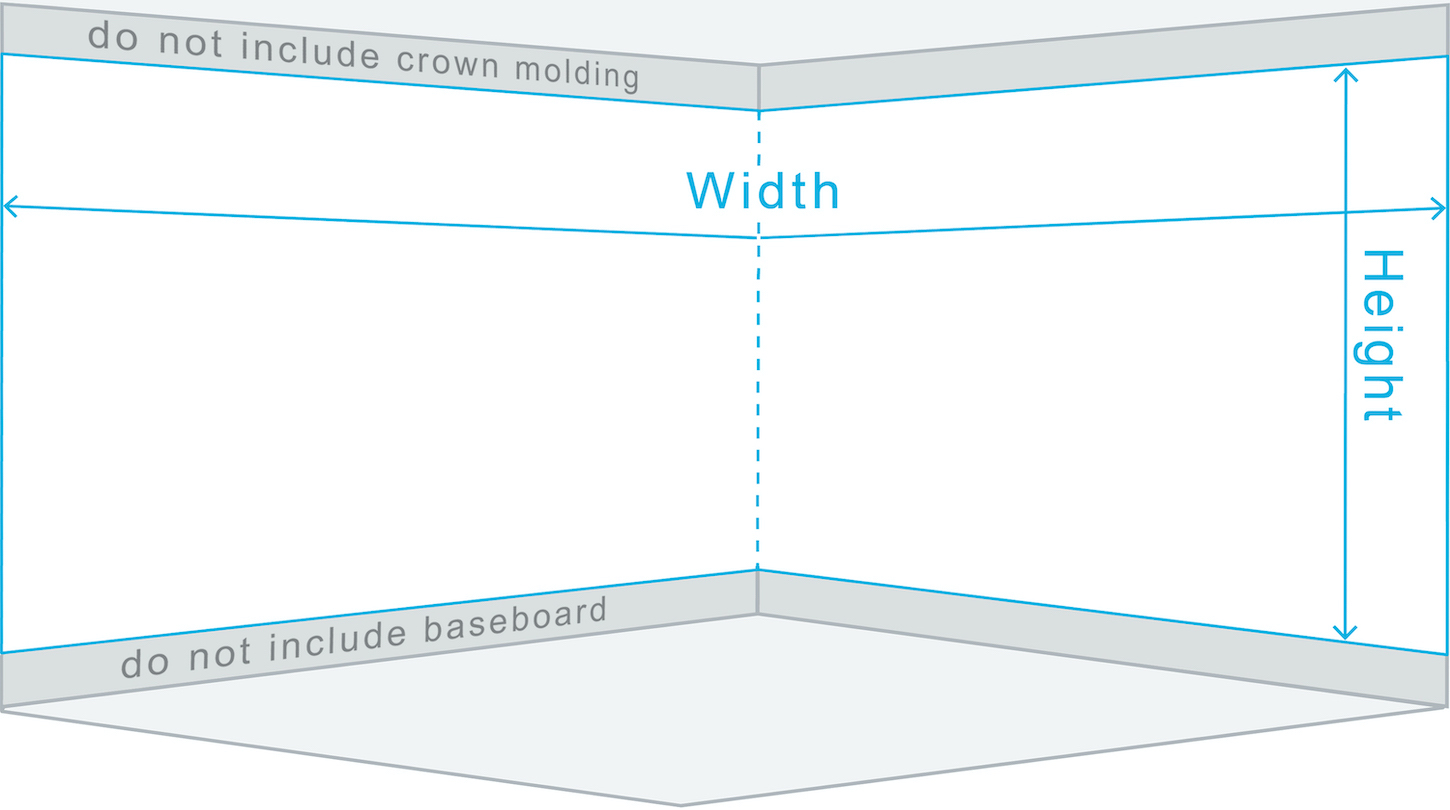
If you want one mural to wrap around multiple adjacent walls, first measure the width of each wall. Exclude baseboards and molding. Then, add all the widths together. Next, measure the height of each wall and use only the greatest height of the walls (do not add the heights together). Finally, submit the combined widths and the tallest height as a single mural order.
Sloped Wall
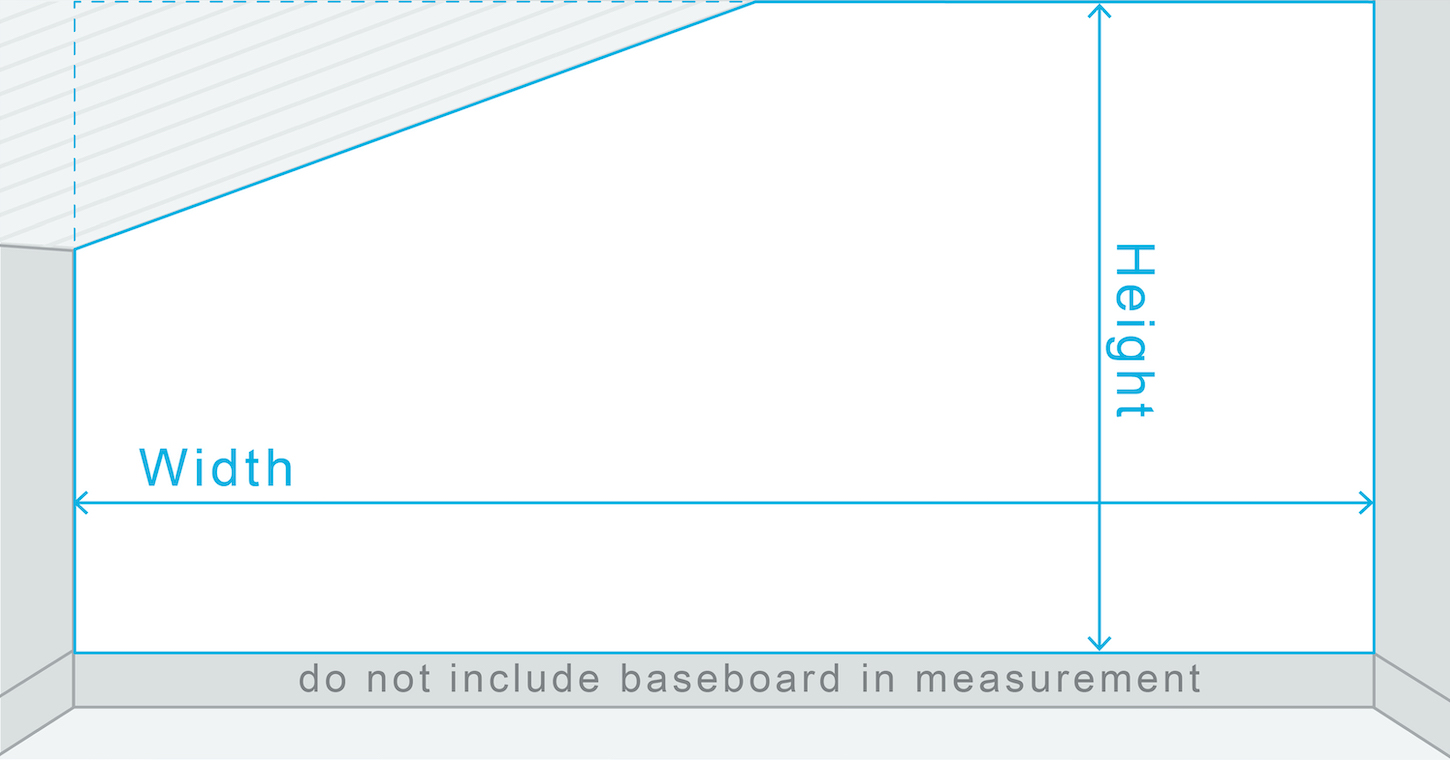
If your wall has a single angled ceiling or roofline, measure the greatest width and the greatest height of the wall, ignoring the slope. Exclude baseboards and molding. The sloped ceiling line will be cut away during the installation process, leaving you with a full rectangle prior to trimming.
Multiple Sloped Walls
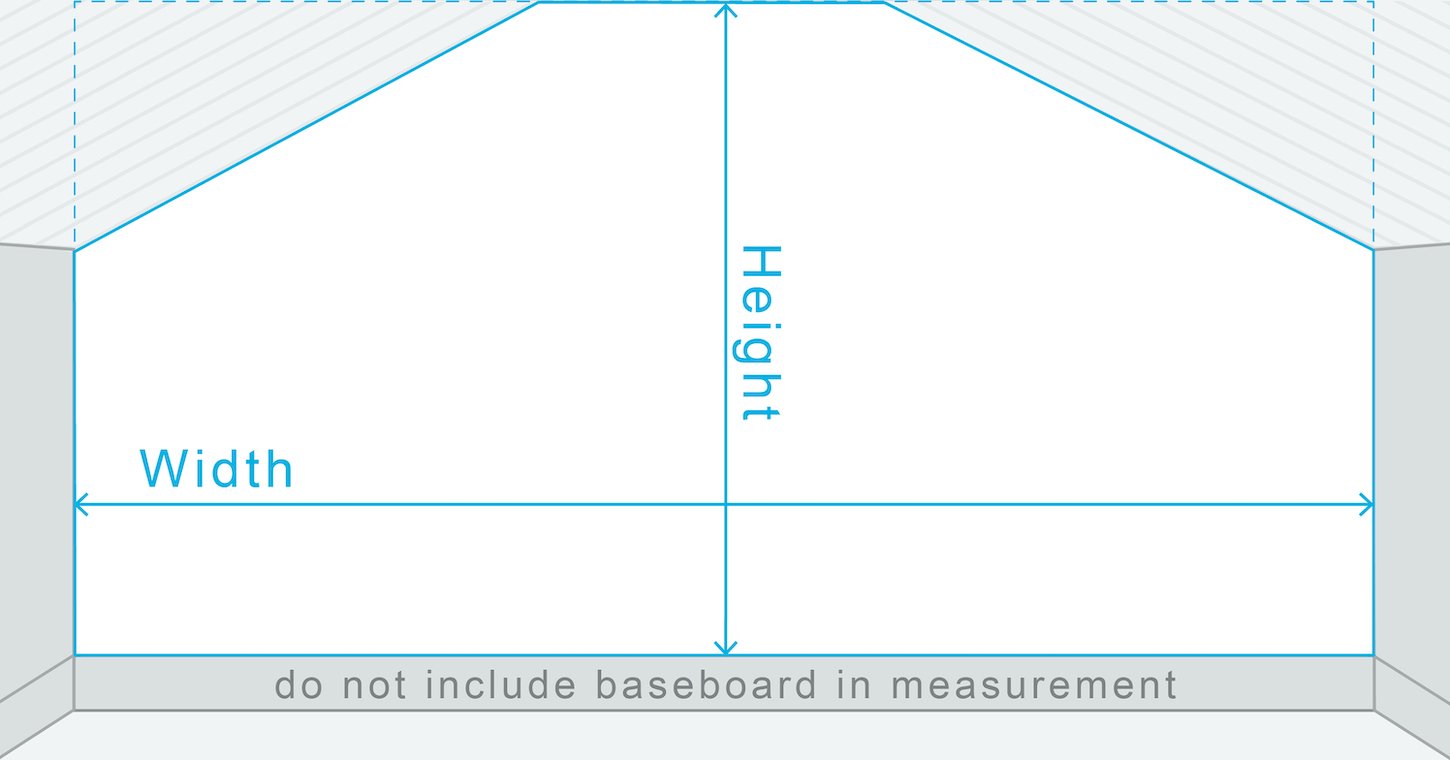
If your wall pitches up to a vaulted peak or A-frame ceiling with multiple slopes, measure the greatest horizontal width from left to right and the greatest vertical height at the tallest peak, ignoring the slopes. Exclude baseboards and molding. Your mural will print as a full rectangle, and the angled edges will be trimmed away along the ceiling line during the installation process.
Staircases
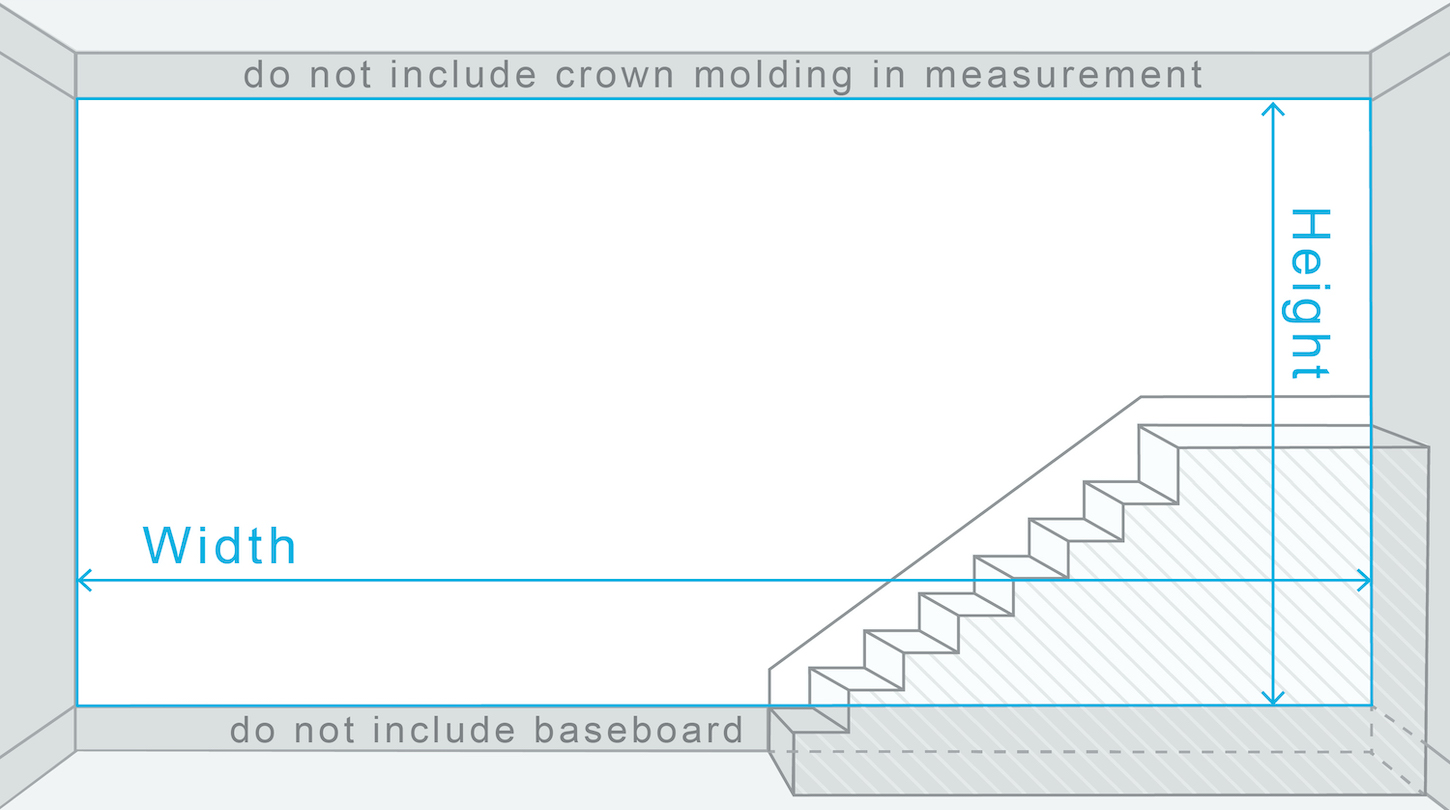
Staircases can be tricky, so take care when measuring. Measure from the highest ceiling point at the top of the stairs straight down vertically to the lowest floor level at the bottom of the stairs, and horizontally from the far left edge to the far right edge (do not measure diagonally along the handrail). Exclude baseboards and molding. Because stairwells often have uneven framing, add 4 inches to both the width and height of your measurements for added leeway during installation.
What Sizes Are Available? (Minimums and Maximums)
Due to our licensing agreements with our artists, all murals have a minimum billing size of 24 square feet, with no maximum size limit. We can custom print a mural smaller than 24 square feet to fit your exact space—just
contact us to place your order with an Account Manager. Please note that murals smaller than 24 square feet are still priced at our 24-square-foot minimum.
Printed Measurements
Murals that are 52" or smaller will print as a single panel at the exact measurements you submit, plus approximately 1/16" of bleed. For larger, multi-panel murals (where width or height exceeds 52"), we automatically add 1 inch of bleed all around (1 inch on every side of the full mural, adding 2 inches to the total width and 2 inches to the total height). This allows for wiggle room when installing on walls that aren't completely straight or square, and the excess will be trimmed away at the ceiling, baseboard, and corners once installed.
Measuring Tips
- Use a steel tape measure: A standard metal tape measure gives the most accurate edge-to-edge reading (avoid flexible cloth tapes, and double-check laser measurements).
- Measure height in multiple spots: Walls are rarely 100% straight. Measure the height at the left corner, center, and right corner, and always take the greatest of those measurements.
- Measure width in multiple spots: Measure across the top, middle, and bottom of the wall and use the widest measurement.
- Always leave out the trim: Exclude crown molding, chair rails, wainscoting, and baseboards.
- Take your time: Measure twice and double-check your figures before placing your order!
Frequently Asked Questions About Measuring
Frequently Asked Questions About Measuring
Should I include baseboards or crown molding in my wall measurements?
No. Only measure the paintable wall area between the top of your baseboard and the bottom of your crown molding (or ceiling). Including trim will make your mural too tall and may result in parts of the design being cut off.
Do I need to add extra inches to my measurements for trimming?
For standard, sloped, and obstacle walls, simply round your largest width and height up to the nearest full inch—for any mural over 52" wide or tall, we automatically add 1 inch of extra bleed all around (on all four sides). The only exception is staircases, where we recommend adding 4 inches to both your width and height measurements due to steep framing angles.
Should I enter my measurements in feet and inches, and what if I have a half-inch measurement?
You can submit your measurements in either feet and inches or total inches—whichever is easiest for you! The most important rule is that we cannot accept fractions or half-inch measurements. Always round any fraction up to the nearest full inch before entering your size (for example, round 96 ½" up to 97").
Questions?
If you have an unusual wall to measure, need help planning around doors or windows, or have any additional questions, please call an Account Manager at 888.558.0279 or fill out our contact us form for assistance.